Tech Guide: How to Create a “Do Not Send” List
Sometimes the Smallest Actions Are the Most Tiresome
Lately I’ve been bombarded with questions about “do not send” lists. A “do not send” list includes all of the recipients that you aren’t interested in sending mailings to, whether on a permanent basis, one-time basis, or even for specific campaigns. Once you create the list, you can be sure that every time you hit the send button, only those that you want them to receive your campaign, will actually receive it.
After you create a “do not send” list, you will never have to remove recipients from your mailing list and add them again once relevant. As you know, your mailing list is your most valuable resource, and you don’t want to delete recipients unnecessarily.
How to Create a “Do not send” List
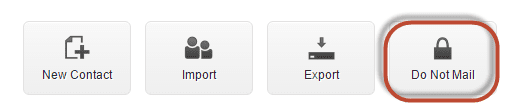
You can effortlessly create the list with ActiveTrail’s platform. Click on “recipients” and choose the “do not send” box.
Enter all of the email addresses of recipients that you don’t want to send them mailings for the time being, separating each address with a comma (,) – this is the more tedious step.

But, hey, don’t worry, there is a way to avoid this monotonous work – the concatenate function in an excel file. The purpose of this function is to unite two text boxes into one.
All you have to do is to transfer the email list to one cell in an excel file, and then unite it with a cell that contains a comma. This is how you do it:

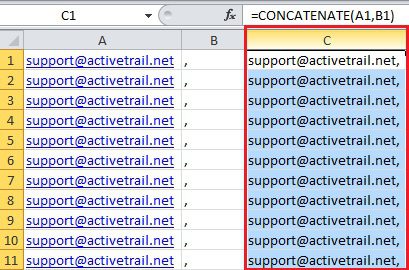
Add the email addresses to column A, the commas to column B and in column C add the following equation:
=CONCATENATE(A1,B1)

The equation will automatically unite the two columns, creating a column with each email address followed by a comma. Afterwards, simply copy and paste column C into the “do not send” box in ActiveTrail’s platform. This way you will have a “do not send” list according to the system’s requirements, even before you’ll finish the coffee you made yourself at the beginning of this article.
A Small Tip
Wondering how you’re ever going to enter a comma into each cell in column B without getting carpel tunnel? Stop wondering, because Excel is going to do it for you! Enter a comma into the first cell in column B, and then double-click on the small square on the bottom right of the cell, as seen in the picture below. This will add a comma to each and every cell in column B, saving you time and hand cramps.

Here at ActiveTrail we have the most efficient email marketing platform, however we are still always on the lookout for new ways to make your life easier.
As we already established, the mailing list is the most valuable resource in email marketing, therefore it must be kept up-to-date and as close to mint condition as possible. To learn more about how to clean up your mailing list, click here.