Landing Page Verification for Facebook Campaigns: Technical Guide
Objectives:
- Make sure your landing page is secured by the HTTPS protocol
- Verify the secured URL vis-à-vis Facebook.
The verification process depends on where your landing page resides. There are two possible options: either your landing page resides on ActiveTrail’s servers or it has a private domain name, which we call CNAME in ActiveTrail.
Verifying a landing page hosted on ActiveTrail’s servers
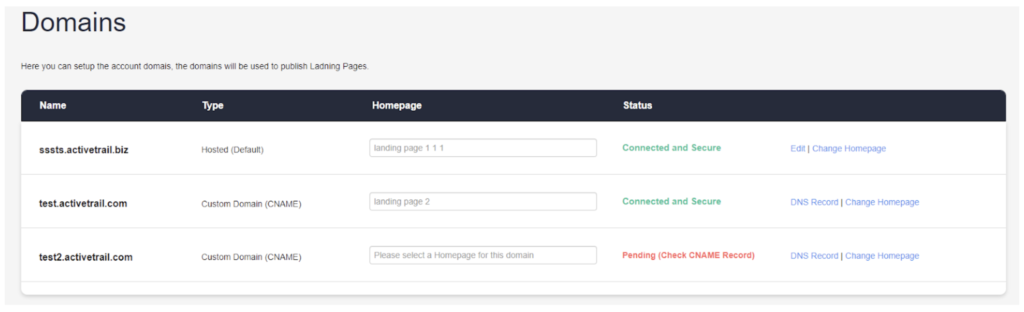
- Log in to the system > Landing Pages > Domains
On the Domains screen, you’ll see all of the domains associated with your landing pages, whether they are private domains (CNAME) or our ActiveTrail domain. From this screen, you may also, if you wish, change your primary subdomain (shared domain).
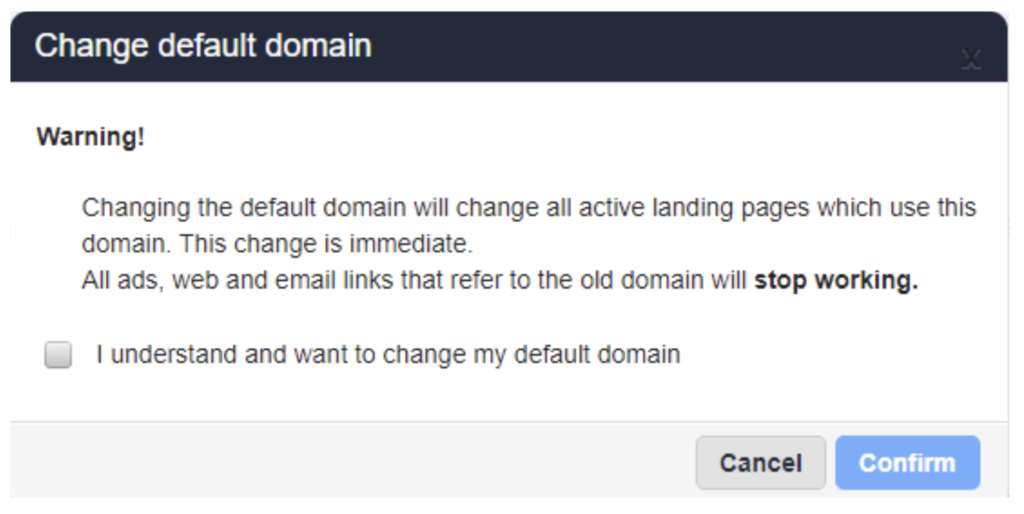
1. Changing your primary subdomain affects all of your existing landing pages. Consequently, if you choose to change your subdomain, a warning will pop up aimed to double-check that you, indeed, want to change your landing pages’ shared domain.
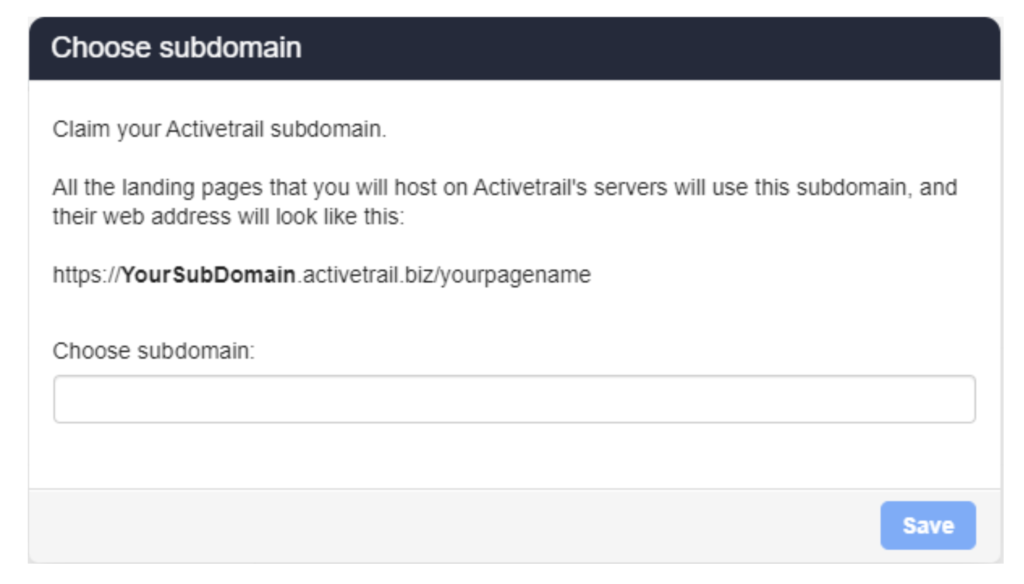
2. After approving the warning message, the system will display another notification asking you to choose a name for your subdomain. For example: https://WeAreActiveTrail.activetrail.biz/yourpagename
3. That’s it. Your sub-domain is now verified, and we can proceed to the next technical step: verifying your landing pages vis-à-vis Facebook.
Note: Landing pages built on our servers are HTTPS by default (although, if for some unknown reason you want to, you can publish your pages using HTTP). As such, unless your pages were built in our system a long while ago, there’s a good chance they are already published under the HTTPS protocol.
Verifying a private domain (CNAME)
In order to verify a domain with Facebook, you must ensure that your domain is secured by the HTTPS protocol as evidenced by an SSL certificate. This is done vis-à-vis the domain provider from whom you lease your URL.
The other thing you will be asked to do is to connect your private domain to ActiveTrail. To form such a connection, you will need to set up a CNAME record with your domain provider. Once you have published the desired landing page under your CNAME connection, you can connect it to ActiveTrail. How? Very simple:
- Log in to the system > Landing Pages > Domains
Choose the desired domain from the list of your domains and click on the DNS Record button.
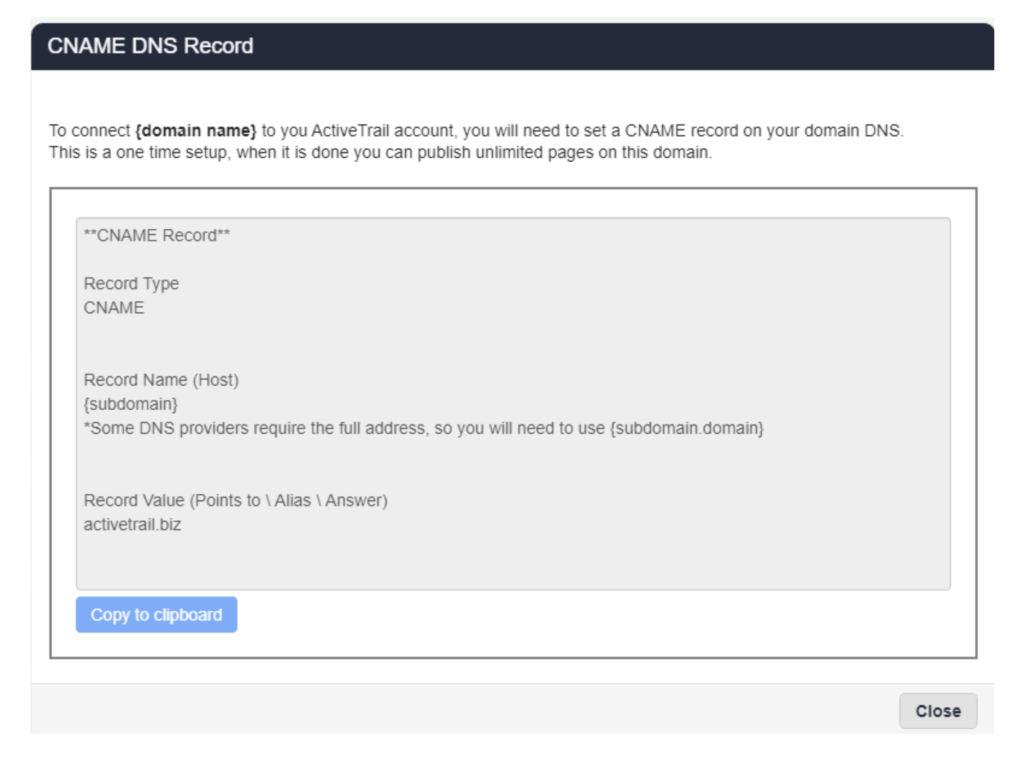
Copy the text displayed in the window and paste it in the appropriate place in your domain provider’s domain management dashboard.
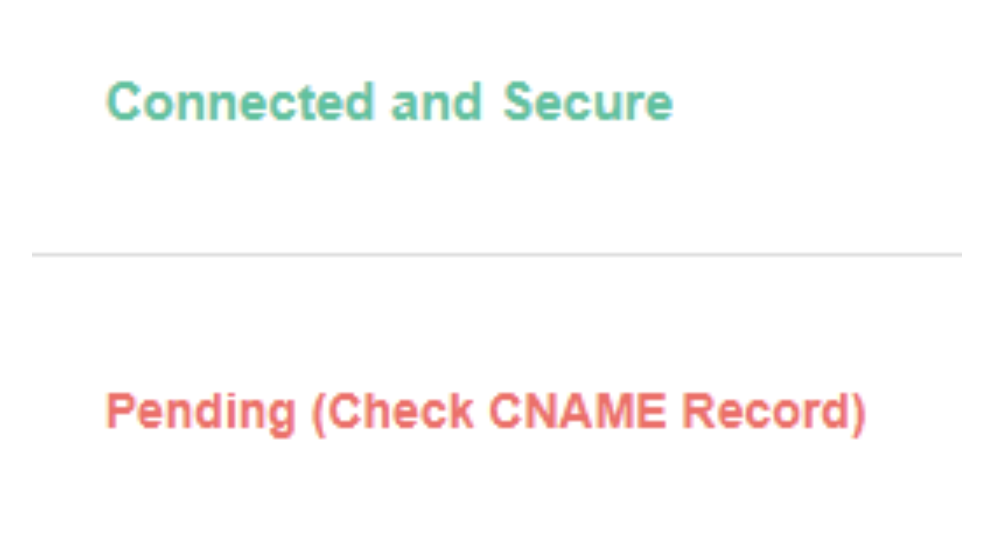
Note: On the Status page within our system, alongside the list of domains, you can see the status of your CNAME records:
Green = private domain is connected and secure.
Red = Domain is not connected and/or properly secured.
Now, after your landing pages have been connected to a secured domain, we can move on to the next phase: Obtaining a verification code from Facebook and installing it in your landing pages.
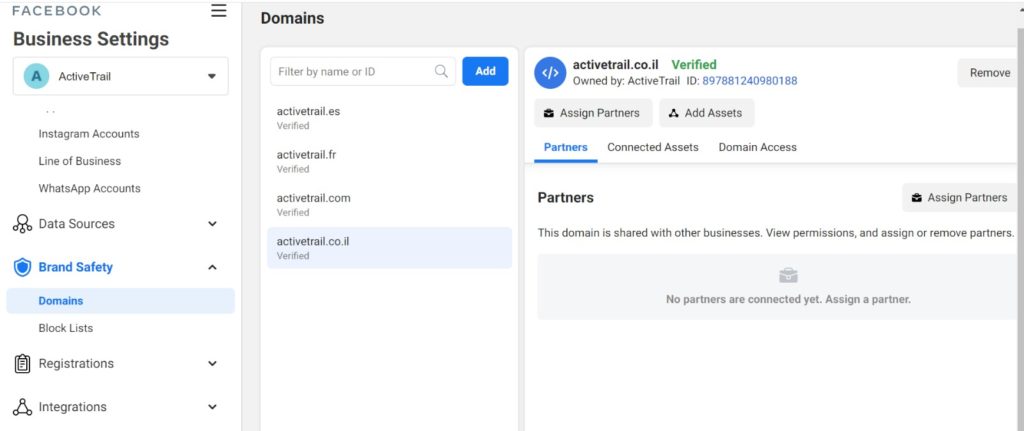
- Log in to Facebook’s business management interface and select: “Brand Safety” > “Domains” > click on the desired domain > “Verify DNS”
- Copy the DNS record; If you have a private domain, go to your provider’s domain management interface and update the record you received from Facebook in the DNS record for your domain.
Note: It may be the case that you will need to contact your domain provider to ask them to add the record for you or to get instructions from them on how to add the record on your own.
If your landing pages reside on ActiveTrail’s shared domain, the process is a bit different (but not much!): On Facebook’s Domains page, choose to verify the domain with TAG instead of a DNS record.
After that, whether you wish to create a new landing page in ActiveTrail, or to use an existing landing page, you will need to add the TAG that you received from Facebook:
- At the landing page design stage, select the “Settings” tab, and under the “Verify Domain” field, fill out the TAG precisely as you received it from Facebook.
- After publishing the page, go to the “Domains” tab under “Landing Pages” – There you will need to set the landing page for which you updated the TAG you received from Facebook as the homepage of the domain you wish to verify.
That’s all. We’re done. From now on, when you launch landing pages under a specific domain that you have already verified vis-à-vis Facebook, they will be considered verified by the big blue giant (attention: you may need to wait 72 hours from the time that you updated your domain’s settings until the change is received by Facebook).
All that’s left to do from here on out, is to bombard the market with excellent content that will convince users to become your clients.