How to Design an Email Newsletter – It’s Simple!
Have a mailing list and excellent content? Have you conjured up a captivating subject line and now wish to design a campaign and to send it to all of your recipients? In the following guide, we have collected all of the tips, tools, and advice to help you quickly and effortlessly create a newsletter design in ActiveTrail.
Email marketing is, and will evidently remain, the most effective form of digital marketing available.
FACT: A US market study shows that 77% of customers prefer to receive marketing information via email.
Not convinced? Here’s some more data:
- 82% of consumers open emails sent by companies.
- 44% of campaign recipients made a purchase consequent to receiving the campaign email
- 7 out of 10 individuals stated that they purchased using a coupon or promotion offered in an email campaign.
- On average, every $1 invested in email marketing yielded $44.25 in income.
Now that we have established the importance of newsletters, let’s take a look at just how simple it is to build and design your own newsletter in ActiveTrail’s email marketing system.
First, sign-on to ActiveTrail and click on “Create Email”.
Constructing a New Campaign
01. Campaign Type
Select the type of campaign you would like to send out:
Regular Email
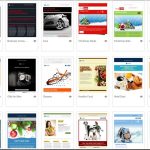
Choose a template from our large selection of ready-made templates, build a new campaign from scratch using a blank template, or import your own, existing template using HTML code.
A/B Split Email
Debating between two different subject lines? Not sure which color will most appeal to your target audience? Design two nearly identical campaigns with slight differences and send each version to a certain portion of your recipients. ActiveTrail will analyze the results, and the better campaign will be sent to the balance of the contacts on your list.
On Event Email
Extras and fringe benefits are not something to shy away from. Moreover, your recipients will expect them. Fabricate a birthday or anniversary campaign once, and configure the system to send the campaign, separately, on the correct date for each recipient.
02. Settings
Providing values for certain campaign parameters is key to your marketing efforts.
Email Name: While this is not the name campaign recipients will see, this is the name you will use to identify the campaign – the time will come when you will want to search for the campaign amongst many others and defining a good “Email Name” will serve you well.
Email Subject (the subject line that will appear in recipients’ inboxes): This is the first thing a contact will see upon receipt of your email campaign. It is imperative, therefore, that the subject line be well-written, concise, believable and not seem to be SPAM (for example: “Sale!!!”). You can make an email subject more personal by adding the name of the contact or some other piece of personal information. The system extracts such details from contact records and fits them into the email automatically. In addition, you can make your subject line stand-out by using icons such as hearts and smilies
From Profile: This is the email address the recipient of your mail will see, so make sure it represents you well. It is possible to add your name and job title. For instance: “Sam, Sales Manager sales@activetrail.net”.
Integrate with Google Analytics: Studying the results of your campaigns can provide valuable insights. ActiveTrail gives you an option to integrate your campaigns with the world’s most advanced analysis tool – Google Analytics – allowing a more thorough investigation of results and to identify optimization possibilities.
03. Design
Now for the fun part. Not a certified graphic designer? Worry not, in ActiveTrail there is no need. With our easy-to-use “drag & drop” editor, advanced image editor and links manager, the visual appearance of your campaign will be decidedly professional.
In the following sections, we provide a step-by-step review of all the features and options available to you within ActiveTrail.
First, decide on your modus operandi, i.e. how you want to work: do you want to start by choosing an existing, pre-designed template from the wide array of templates prepared for you by ActiveTrail’s graphical designers? Or maybe you prefer to work on a fresh and clean template that you construct on your own?
After selecting a template, begin building your newsletter by importing “blocks” (text, pictures, buttons), adding links, editing texts and pictures, etc.
04. Importing Blocks
From the panel to the right of the editing window you may select blocks to add to your newsletter by dragging and dropping them in the right place. These blocks can be edited, moved and rewritten.
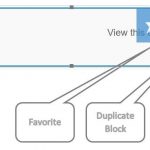
When hovering over a block with your mouse, you will be presented with several options:
Editing options are displayed when clicking on the block:
Block Structure: You may select from a number of display options, depending on the type of block (title, text, image).
Padding: Determine the spacing between the current block and the other blocks in the campaign.
Line Color: Choose separate colors for the top and bottom lines of your campaign, based on the colors of your logo or the nature of the email.
05. Block Types
Header Block
Many email marketers prefer that their newsletters also be made available as webpages, for purposes of SEO and to avoid images being blocked as well, a common practice amongst email providers. As such, Header Blocks can be dragged on to your email to automatically create a link for displaying the email as a webpage.
Text Block
Drag a Text Block onto your mail to start writing up your campaign. Text can be edited by clicking on “Edit Element” within the block.
You now have an opportunity to play around. Select a font for your text, its size, color and so forth. You can change the color of the block, choose an alignment (left, right, center), add tables, emoticons and more.
Image Block
There are several methods for adding images to your campaign, as follows: uploading a file, making a purchase, at a substantial discount for ActiveTrail customers, directly from Bigstock Photo’s massive selection of images, or by picking an image from your Gallery, containing pictures you have already uploaded to the system at some point in the past (all of the images that you upload are stored in ActiveTrail’s databases for reuse).
You may edit your pictures in our advanced Photo Editor by clicking on “Edit Element” within the block and then clicking on “Edit Image”. With the Photo Editor, you can make many different types of changes to your pictures, such as, cropping, resizing, adding frames, applying special effects, modifying saturation and much, much more.
06. Buttons
Buttons may be used for a variety of functions, such as, “Read More”, “Buy Now”, “Contact Us” and so on. Whatever its intended use, a button is of vital importance as it prompts a user to take the very action for which you created your campaign in the first place.
You may select a button from our gallery of buttons or design one yourself using ActiveTrail’s editor. You can change the button’s size, its caption, color and more. Don’t forget to add a link, so that users are redirected to your intended location when clicking on the button.
07. Links
It’s possible to add a link to any element, whether it be text, an image or an action button, by clicking on “Edit Element” and then on the button with the “link” symbol.
Decide which element you want to link, select it, and click on the link symbol. Afterwards, choose where the link will lead to:
Internet Address: Link to a URL – your homepage, for instance.
File: Link to an external file containing information you wish to share, such as a PDF file with quarterly performance numbers.
Email Address: When clicked by a campaign recipient, an email link will open a new email pre-populated with your email address, so that the recipient may contact you.
Survey: You may create a survey using the ActiveTrail system, and send it to participants via your newsletter.
Landing Page: Construct a promotional landing page in ActiveTrail, and link to the page from your campaign. This allows you to focus on content in your email, while you can use the landing page to add a registration form and other calls to action.
System Page: Links to pre-defined pages within ActiveTrail, such as, an unsubscribe page, a link for viewing the campaign on a webpage, a “Report SPAM” page, etc.
Anchor: With the help of anchors, you can create links to locations in the body of your email, offering your recipients simpler and smarter navigation within your newsletter.
Telephone Number: Great for mobile phone users. With such a link, clicking on a phone number within your email will launch the phone application with the phone number already keyed in. This allows your recipients to contact you in the quickest possible way straight from your newsletter.
08. Triggers
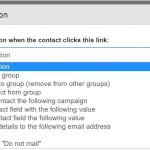
By adding a trigger you can coordinate a certain action to occur when a recipient clicks on the link to which the trigger is attached.
Triggered actions amplify the effectiveness of your campaign by helping you to understand your recipients and to internalize this information for future use. For example, if a recipient clicks on a purchase link within your email, you can add them to a group marked for receiving special promotions.
09. Additional Settings
To make broad-based changes to the whole newsletter, e.g. changing color, spacing, and borders, you may select the “settings” tab in the blocks panel (to the right of the editing window). Under the “favorites” tab, you will find blocks that you have saved in the past for reuse in future campaigns.
10. Preview and Trial Mailing
Click on the “Preview” button at the top left corner of your screen in order preview your new creation, both as it will appear on standard screens and on mobile devices.
Does your campaign look good on both platforms? Check again and perform a test mailing to email addresses from providers such as Walla, Gmail, and similar services. Make sure the campaign looks good, including images and links.
Itching to start designing?
Sign-on to ActiveTrail and start emailing!
Still have a few questions?
ActiveTrail’s support team is available to you Sundays through Thursdays
Between the hours of 09:00 – 18:00
By chat, by phone at +1 (929) 214-1037
Or by mail at support@activetrail.net


