ActiveTrail for Salesforce: The Next Steps
Congratulations, you’ve successfully installed ActiveTrail for Salesforce! Now it’s time to roll up your sleeves, map ActiveTrail’s contact fields and learn how to use the “Leads” and “Contacts” tabs, as well as the Campaign Settings. Ready? Let’s get started.
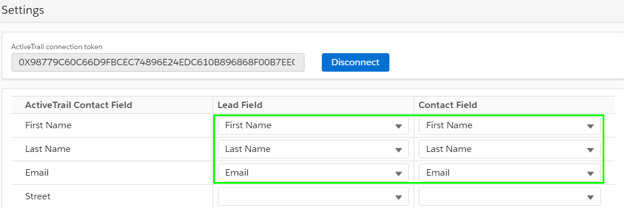
Mapping ActiveTrail’s Contact Person fields
- Go to the Settings
- Match the appropriate values in the Contact Field – Lead Field selection boxes to ActiveTrail contact fields.
For example:
- Select the value Email from the dropdown lists in the Lead Field and Contact Field columns, in the row designated “Email” under the “ActiveTrail Contact Field” column.
- Select the value Street from the dropdown lists in the Lead Field and Contact Field columns, in the row designated “Street” under the “ActiveTrail Contact Field” column.
- Scroll down to the bottom of the page and click Save.
After defining the relationships between Salesforce and ActiveTrail fields, any information entered in these fields in the Lead for Contact screens, will also appear in the corresponding Contact person fields in ActiveTrail.
Leads Tab
Creating a new Lead
Lead – A record that includes contact information (name, address, phone, etc.) for a specific customer.
- Go to the Leads
- Click on the New
- Fill out the necessary fields. You must, at least, fill in the required fields
- Click on the Save
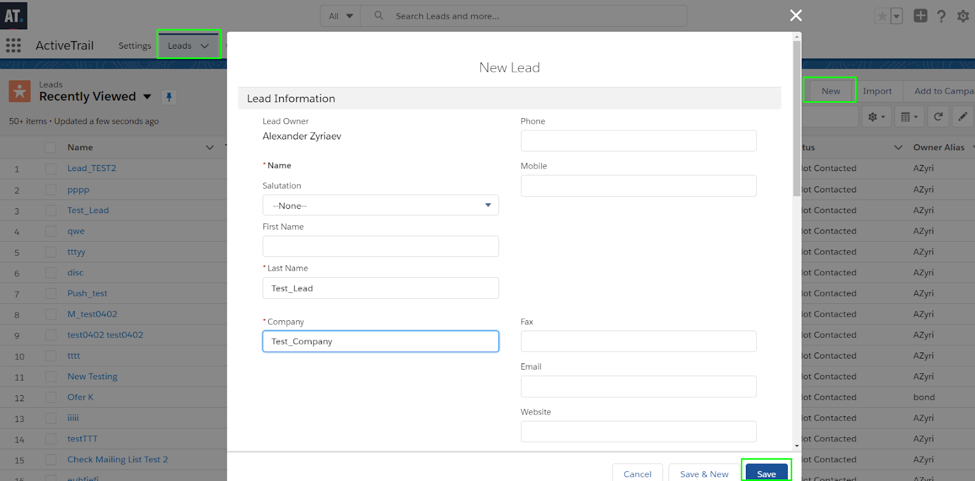
We recommend unchecking the Push to ActiveTrail checkbox on the “New Lead” and “New Contact” forms. We also recommend removing the Last Sync Date field from the new Lead creation process.
Synchronizing Leads to ActiveTrail
In order to synchronize a Lead from Salesforce to ActiveTrail, the Lead must be associated with a Campaign. Without a Campaign, you won’t be able to add Leads to ActiveTrail.
Campaign – a form of a group that allows you to add leads or contacts to mailing lists within ActiveTrail.
- You can add a Lead to a single Campaign or simultaneously to a number of Campaigns.
- You can add a number of different Leads (pay attention: not the same Lead to a single Campaign.
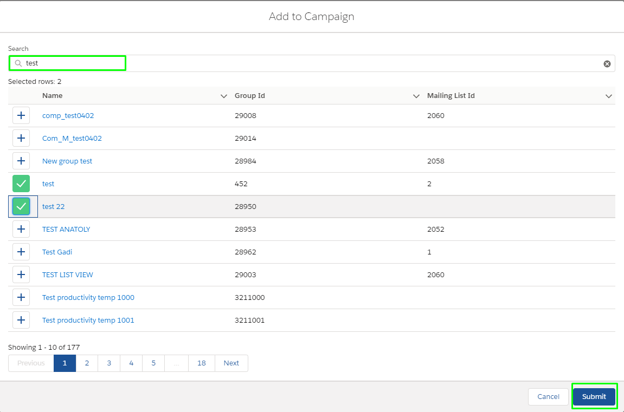
Adding a Lead to a single Campaign or to multiple Campaigns
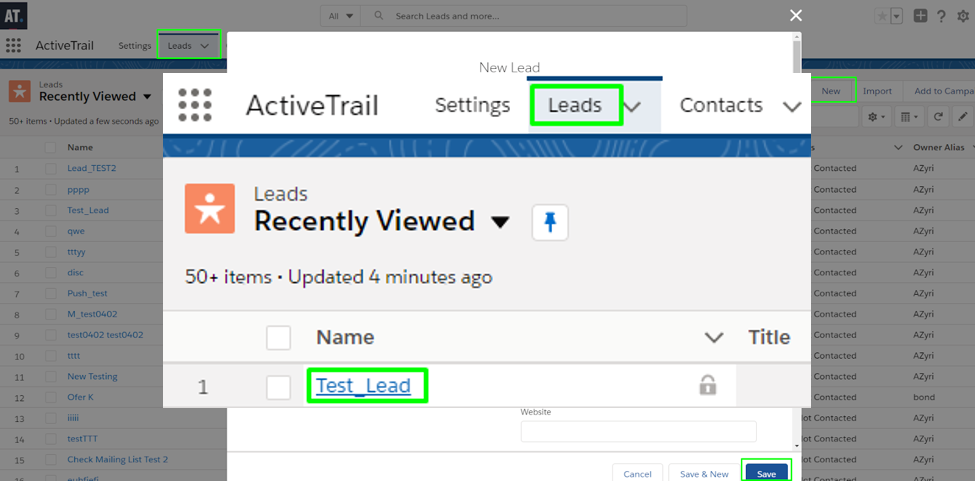
- Go to the Leads tab and open the desired Lead.
- Click on the Assign to Campaign

- Type in the name of a Campaign in the search box and press Enter.
- Select one or more groups from the list.
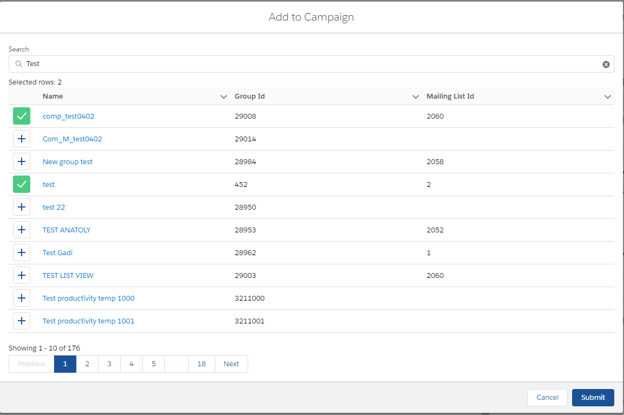
- Click on the Submit
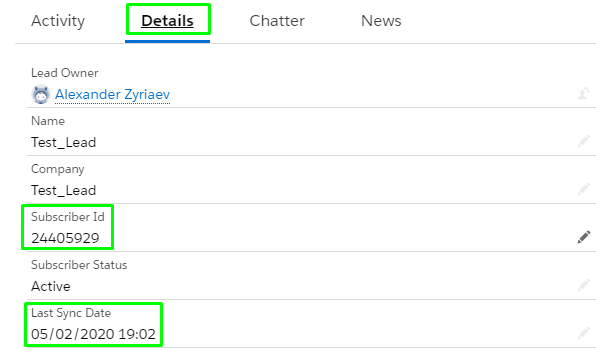
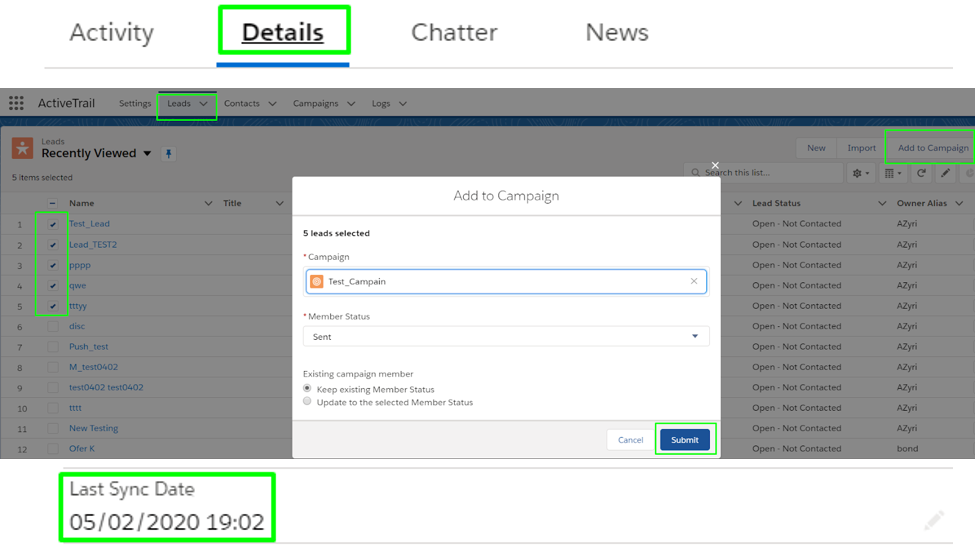
- The Subscriber ID and Last Sync Date fields will be added to the Lead under the Details tab and the Lead will be synchronized to ActiveTrail to the selected groups and mailing lists. Please note: if you did not add these fields in the settings – data will be added to the fields, but they will not be displayed.
Adding multiple Leads to a single Campaign
- Go to the Leads
- Mark off the desired Leads from the list.
- Click on the Assign to Campaign
- Choose the name of the Campaign in the search box.
- Click on the Submit
Important: You may add multiple Leads to a Campaign from the “Leads” screen
Updating an existing Lead
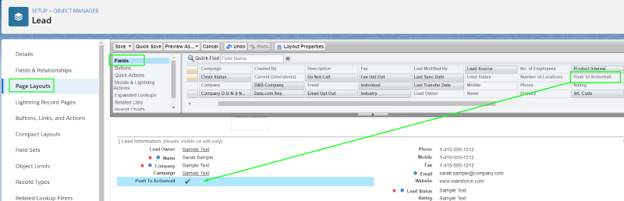
In order to synchronize to ActiveTrail, the Push to ActiveTrail checkbox must appear on the Leads layout.
- Go to the Leads
- On the Setup menu, click on the Edit object
- Click on the Page Layouts link and then on the Lead Layout
- Select the Fields panel from the list and drag the Push to ActiveTrail checkbox on to the Lead information area.
- Click on the Save
To update an existing Lead:
- Go to the Leads
- On the menu at the end of the row for the desired Lead, press Edit.
- Unmark the Push to ActiveTrail
- Make the desired changes or additions on the Lead form.
- Click on the Save
- Click on Edit again, mark the Push to ActiveTrail checkbox, and then click on the Save
Deleting an existing Lead
- Go to the Leads
- On the menu at the end of the row for the desired Lead, press Delete.
- Press Delete.
Important: after carrying out these steps, the Lead will still appear in ActiveTrail, as synchronization is not activated in the case of a deletion. You will need to manually delete the Lead from ActiveTrail.
Contacts Tab
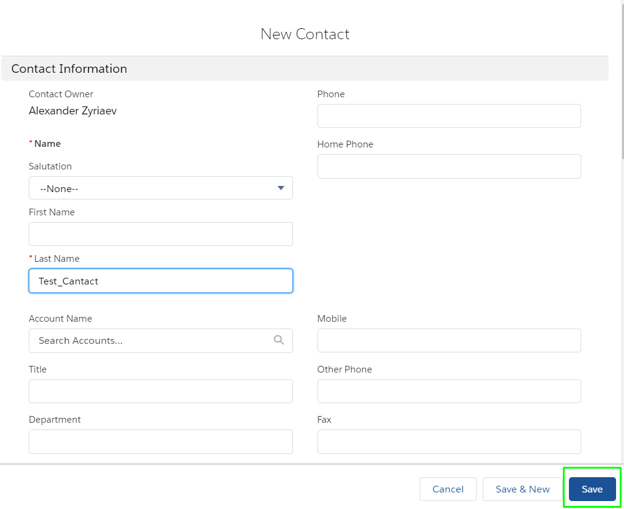
Creating a new Contact
Contact: A record containing contact information (name, address, phone, etc.) for a specific customer.
- Go to the Contacts
- Click on the New button.

- Fill out the required fields. You must, at least, fill in the required fields
- Click on the Save button.
Synchronizing a Contact to ActiveTrail
In order to synchronize a Contact from Salesforce to ActiveTrail, the Contact must be associated with a Campaign. Without a Campaign, you won’t be able to add Contacts to ActiveTrail.
Campaign – a form of a group that allows you to add leads, contact people to groups or mailing lists within ActiveTrail.
- You can add a Contact to a single Campaign or simultaneously to a number of Campaigns.
- You can add multiple Contacts to a single Campaign.
Adding a Lead to a single Campaign or to multiple Campaigns
- Go to the Contacts tab and open the desired Contact.
- Click on the Assign to Campaign

- Type in the name of a Campaign in the search box and press Enter.
- Select one or more groups from the list.
- Click on the Submit
- The Subscriber ID and Last Sync Date fields will be added to the Contact under the Details tab and the Contact will be synchronized to ActiveTrail to the selected campaigns and mailing lists.

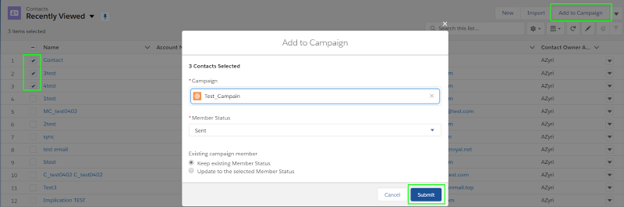
Add multiple Contacts to a single Campaign
- Go to the Contacts
- Mark off a number of Contacts from the list.
- Click on the Assign to Campaign
- Choose the name of the Campaign in the search box.
- Click on the Submit button.
Updating an existing Contact
In order to synchronize to ActiveTrail, the Push to ActiveTrail checkbox must appear on the Contacts layout.
- Go to the Contacts
- On the Setup menu, click on the Edit object
- Click on the Page Layouts link and then on the Contact Layout
- Select the Fields panel from the list and drag the Push to ActiveTrail checkbox on to the Contact information area.
- Click on the Save
To update an existing Contact:
- Go to the Contacts
- On the menu at the end of the row for the desired Contact, press Edit.
- Unmark the Push to ActiveTrail
- Make the desired changes or additions on the Contact form.
- Click on the Save
- Click on Edit again, mark the Push to ActiveTrail checkbox, and then click on the Save
Deleting an existing Contact
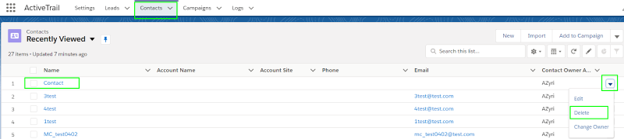
- Go to the Contacts
- On the menu at the end of the row for the desired Contact, press Delete.
- Press Delete.
Important: after carrying out these steps, the Contact will still appear in ActiveTrail, as synchronization is not activated in the case of a deletion. You will need to manually delete the Contact from ActiveTrail.
Campaigns Tab
Creating a new Campaign
Campaign: A type of group to which you can add Leads or Contacts as campaign recipients, and then to groups and mailing lists in ActiveTrail.
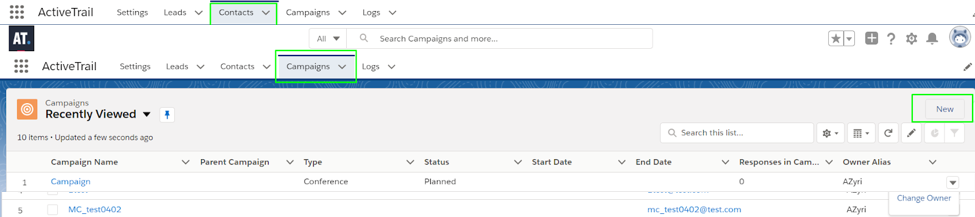
- Go to the Campaigns
- Click on the New button.
- Fill out the name of the Campaign.
- Click on the Save button.
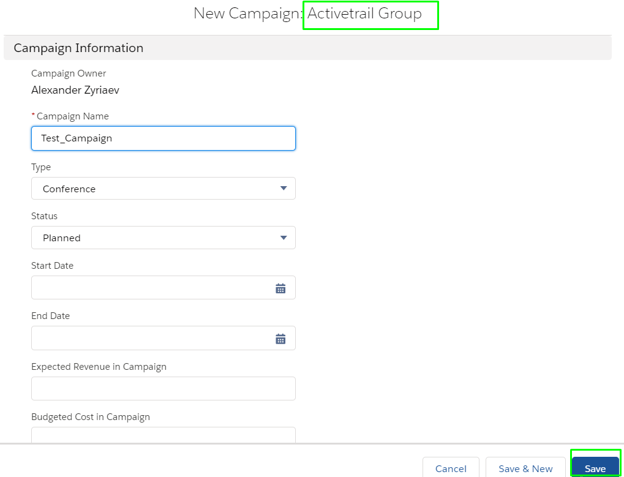
- The value of the Record type field for a new Campaign must be “ActiveTrail Group”.
- On the new Campaign form, the Group ID and Mailing List ID fields must be hidden.
- On the new Campaign form, the Assigned to ActiveTrail checkbox must be hidden.
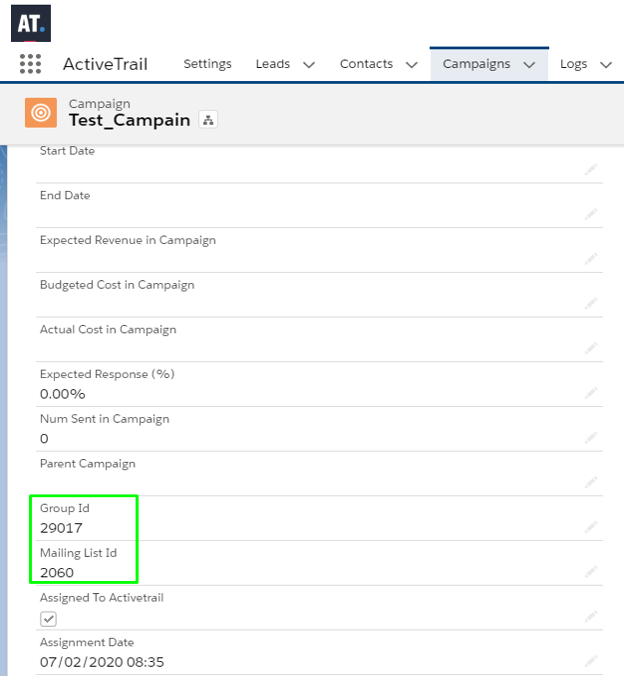
Synchronizing a Campaign to ActiveTrail
- Go to the Campaigns tab and select “New Campaign”.
- Click on the Assign to ActiveTrail

- Select Create new in step 1 and click on Next.
- Give the Campaign a name and click on Next.
- Find the name of the mailing list through the search field or select it from a list. Click on Save.
- If you haven’t created a new group, choose Select existing in step 1. Click on Next.
- Search for the name of the group in the search field or select it from a list. Click on Next.
- Search for the name of the mailing list in the search field or select it from a list. Click on Save.
- Confirmation of successful execution will be displayed.
- The Group ID and Mailing List ID fields will be added to the Campaign’s Details tab (again: if you haven’t created a new group). Based on your selection in step 2 above, the Campaign will be assigned to an existing mailing list or the system will automatically create a new mailing list.
Adding Campaign Recipients (Members)
Campaign Members – Leads or Contacts.
- Go to the Campaigns
- Open a Campaign that has been associated with ActiveTrail.
- On the Related tab, go to the Campaign Members
- Click on the Add Leads button.
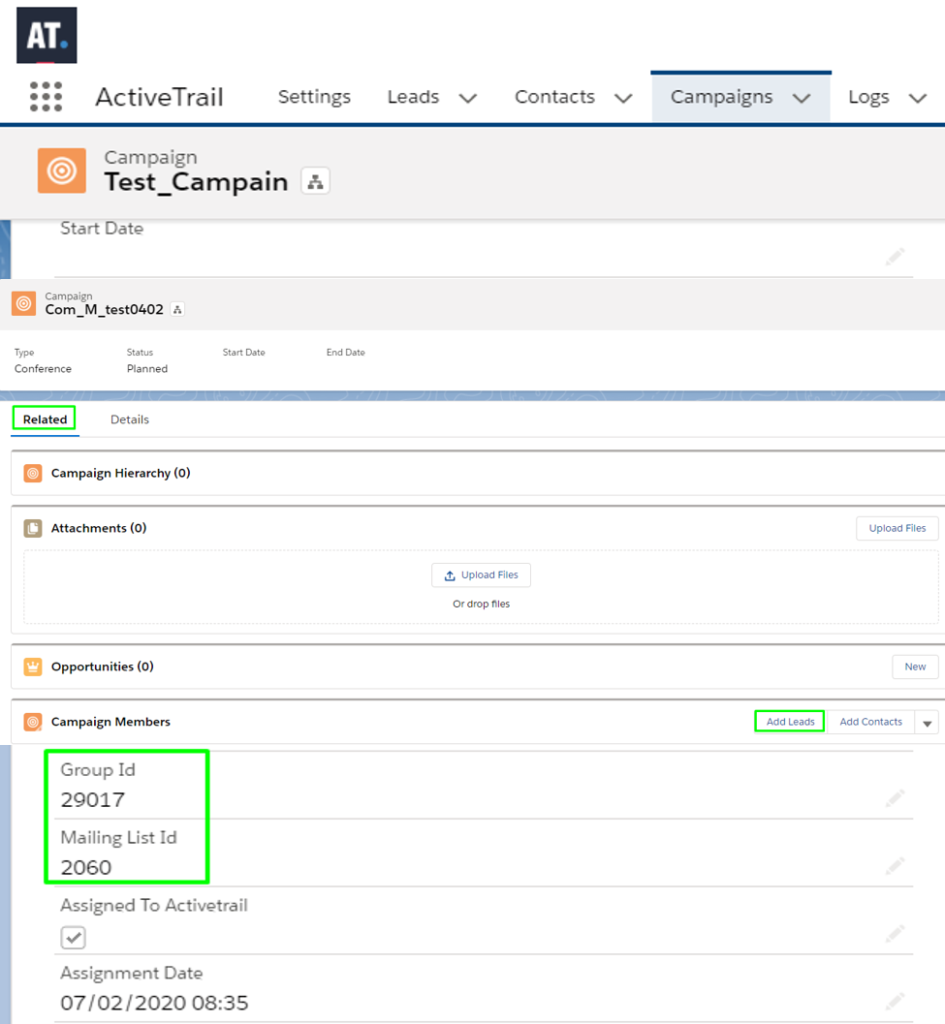
- Search for the name of a Lead in the search field or select from a list. Click on Next and then on
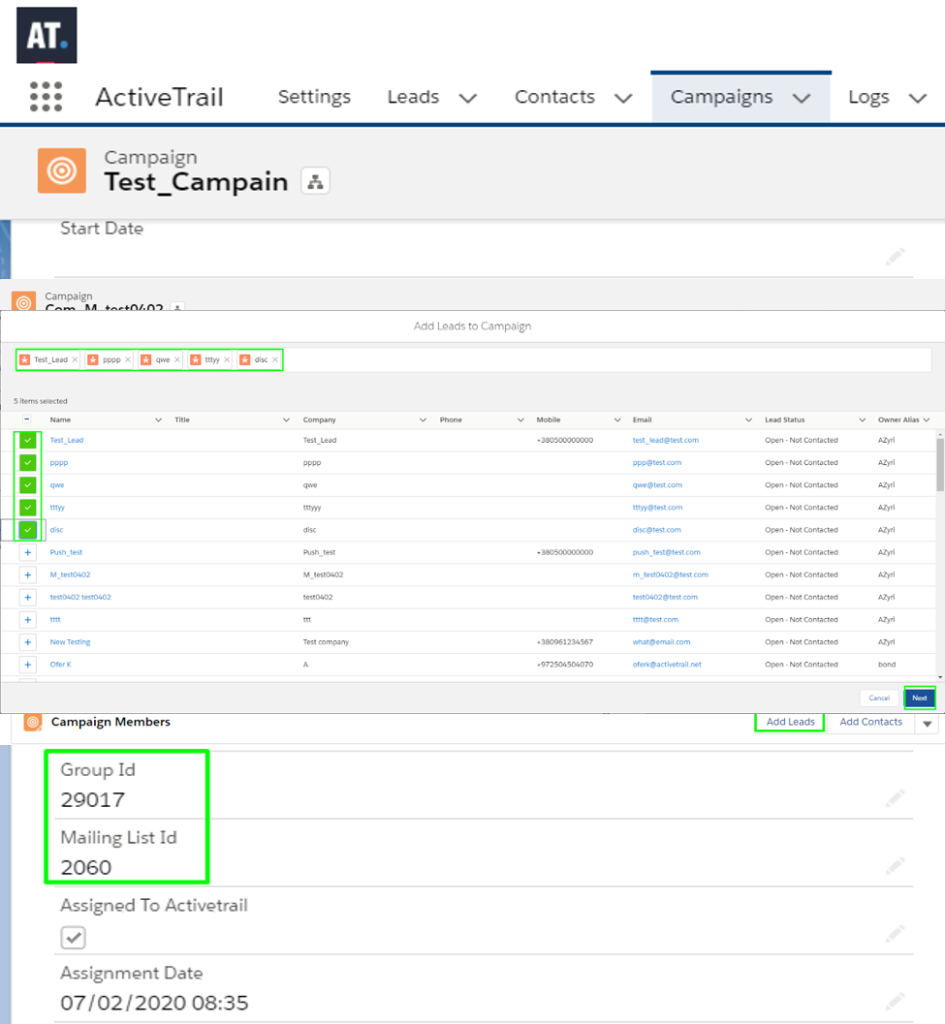
- A message confirming the successful execution of the update will be displayed.

The leads will be added as Campaign recipients and a circular diagram indicating the number of leads added to the campaign will be presented. The leads will be added to the selected group and mailing list in ActiveTrail.
Important:
- You can add Contacts as Campaign recipients in a similar fashion.
- You cannot associate a Campaign to ActiveTrail if it already contains Campaign recipients.
Stage 3: Statistics
Now that you have connected ActiveTrail to SalesForce, you can begin tracking.
Active Statistics
After sending an email or SMS campaign from ActiveTrail to a set of recipients, email and SMS activity data will appear in the Lead and Contact areas. You can view this data in various time based cross-sections (today, last week, last month, last quarter).

Adding activity statistics to a Lead or Contact Person
- Go to the Leads
- Select a Lead and open it.
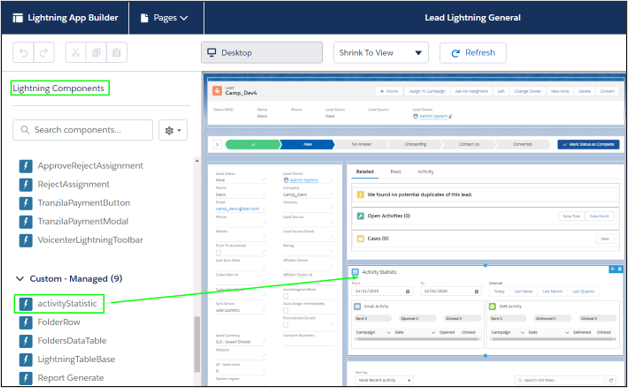
- On the Setup menu, click on the Edit Page
- On the Lightning Components side panel, scroll down to Custom-Managed.
- Drag the activityStatistic element onto the Lead area.
- Click on the Activation button.

- On the App Default tab, click on the Assign as App Default

- Mark the ActiveTrail checkbox in the list and click on Next.

- Click on the Save button and then on Back.