Integrate ActiveTrail with WooCommerce
WooCommerce is an open-source code based customizable sales platform built as a WordPress plugin. It enhances your WordPress site’s activity and allows it to function as an e-commerce shop.
With the help of the following guide, you will learn how to connect your WooCommerce store to the ActiveTrail system.
Here’s what you’ll need to connect your store:
- An active ActiveTrail account
- A WooCommerce plugin installed on your WordPress site
Connecting your WordPress store with the WooCommerce plugin to ActiveTrail requires installing additional plugins: The first enables the connection and the other upgrades the connection and adds Webhooks so the ActiveTrail system can recognize cart abandonment.
Before we dive-in…
Click here to download the first plugin to WooCommerce
Click here to download the second plugin to WooCommerce
Connect WooCommerce to ActiveTrail
1. Login to ActiveTrail and click on >> ‘Integrations” >> ‘ActiveCommerce’:
2. Select the relevant e-commerce platform, in this case, WooCommerce:
3. Fill in your store’s details in the corresponding fields, as follows:
“Store URL” – the web address of your online store.
“Unique Key”* – the Token you received after installing the plugin.
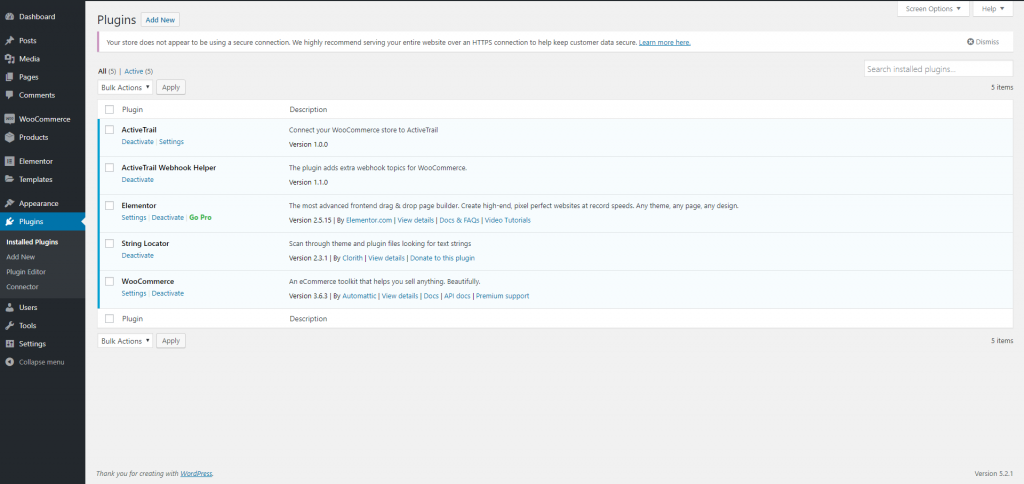
*To obtain the Token code, execute the following steps within the WordPress interface of the site on which WooCommerce is installed:
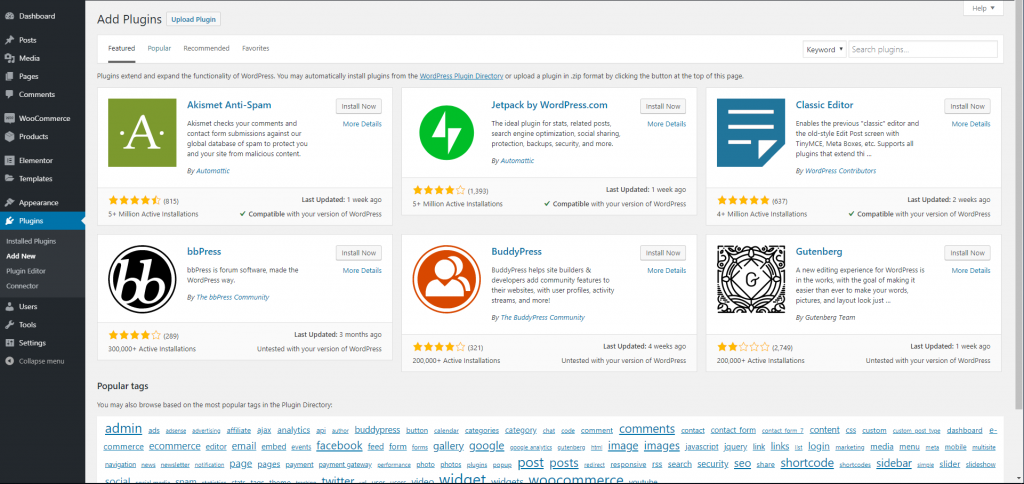
4. Go to the WordPress site edit and choose ‘plugins’ >> ‘add new’:
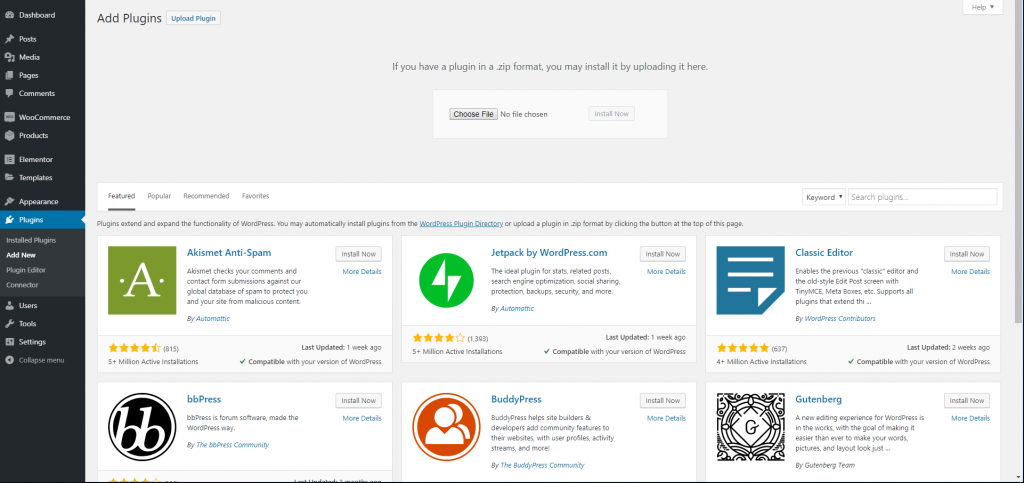
5. Click to upload the plugin >>
6. Make sure you downloaded plugin 1 and plugin 2 mentioned at the beginning of this guide.
7. Note: managing email verification in WooCommerce is performed by a third plugin. This requirement comes directly from WooCommerce, and you can not meet it without using one of the following two plugins:
First Option – a Free Plugin
Click on this link and download the plugin. This is a free plugin that enables a separate creation of a consent form, meaning – your contact would be asked to sign-up once more (on top of opening their store account or purchasing at your store).
Second Option – a Paid Plugin
Click here to download the paid plugin, which will allow you to enjoy the following features:
- A mailing list sign-up consent checkbox (meaning, your contacts will go through one process for both purchasing and signing-up to your mailing list)
- An automatically-added mailing list sign-up consent checkbox to your store’s sign-up form
- Creation of a separated mailing list consent form (equal to the free plugin)
The installation process for this plugin:
- Following the installation of the plugin, go to Woocommerce > Settings > Newsletter
- A screen will pop up. Fill in it an API token from your ActiveTrail Account (which needs to be synchronized)
- Choose the group to which your contacts would be synchronized.
- Very important! Select the status of the orders you wish to sync (our advice is to choose the following: “pending payment,” “processing,” “on hold,” and “completed”)
8. Select the ZIP file you downloaded here and install both plugins to the system.
9. Next, go back to the plugin screen (the first screen) >> choose the first plugin and click ‘settings’ >> then copy the “Unique Key”.
10. Finally, paste Unique Key to the ActiveTrail integration settings, as described above
That’s it. You now have access to all of ActiveTrail’s advanced e-commerce features, allowing you to build automation based on actions taken in your store, such as: recovering abandoned carts, post-purchase emails, re-engaging inactive customers and more…
*Email delivery permissions should be managed separately or with an additional plugin.
If you want to hear more about connecting your online store to ActiveTrail, please contact our support team at +1 (929) 214-1037.
Click here to read more about ActiveTrail for Ecommerce.
We invite you to learn more through video clips and guides available in our Learning Center.


